


Here are the widget options you could create:

Let's break it down step by step.
Step 1
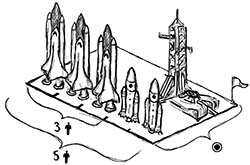
Let's say you have 5 rockets, but only three of them can travel deeper into space. You may also want to offer the entire spaceport for booking - for launching any rocket, even a customer's personal one.
First, create a new resource for your rockets. Indicate that this resource has 5 total items available for booking - we call them shares.
Then, set up a price option with a default price for each type:
- Full Spaceport - $70k for the entire resource
- Orbital Flight - $15k, with 5 shares available
- Deep Space - $30k, with 3 shares available
Step 2
You also have 10 jetpacks that can be booked along with the rocket, at $3k each.
To set this up, create a new field called Jetpack, mark it as paid, and limit it to 10 shares.

Step 3
Now let's set up the booking schedule. First, create a new Rule for weekdays. It automatically uses the default pricing settings you specified before.
You can assign any calendar to your rules, and you can even import an .ics file from apps like Google Calendar.

Step 4
But for weekends, we want to charge higher prices.
Create a new Weekend rule, then specify higher prices for each price option and field.
You can create multiple rules to override different settings over time - such as price, shares, and availability. You can also dynamically shift these rules to offer early-bird discounts or block last-minute bookings.

Step 5
Let's say we want to offer a discount for certified astronauts, but only on weekdays and only for Orbital flights.
First, add a checkbox field labeled "I'm an astronaut." Then, disable it for weekends.

Step 6
We want to offer a $1k discount for each Orbital Flight rocket booked by certified astronauts. To set this up, create a new Pricing Component with the formula: -1000 * [Orbital].
Next, add a condition so that this Pricing Component only applies when the "I'm a certified astronaut" checkbox is selected.

Step 7
Finally, let's add a standard 5% "zero-gravity tax." Create another Pricing Component and set the formula to 5, then choose % as the unit.
You can add as many pricing components as you want, using different reservation data as formula parameters. You can also disable components for specific rules or apply them only to certain price options or paid fields.

Done!
Try out a few examples below:
Choose between a light or dark theme and set any primary color you like.
Want more control? Customize the entire widget design using CSS.
See some examples below:
You can display a warning — "Don't forget your astronaut certificate" — that only appears when the "I'm a certified astronaut" checkbox is selected.
You can also hide that checkbox whenever no Orbital Flight Rocket is chosen.

Choose from 30 localizations, or translate the widget yourself by customizing any text.
You can also set any currency, time zone, and date or time format to match your local preferences.
Check out some localized examples of our spaceport widget:

Design custom email templates with any order data you need. These can range from simple text emails to beautiful, responsive HTML templates.
You can create as many templates as you like and use them to send messages to customers, employees, or yourself to stay updated on order events.
Emails to customers can be sent from your company address and signed with your domain's DKIM.


Your orders can include multiple reservations, much like items in a shopping cart. Both orders and reservations have statuses that track each step of your business workflow. You can create as many statuses as you need.
To automate tasks, use triggers. They can run manually or automatically on specific events, such as "15 minutes before the reservation starts." Each trigger executes a set of tasks - like sending an email, changing a status, or adding a comment. You can also apply conditions based on order data so that tasks only run if certain criteria are met.
Triggers can even send web requests containing any order data to your server or other external systems (e.g., CRM, Zapier, or SMS gateways).
In our rocket example, you could create a trigger that sends a Telegram notification to the manager if a jetpack isn't returned within 10 minutes after the reservation ends.

Preconfigure tables to display any order data columns, with sorting and filters applied for a predefined period.

You can also analyze your data by switching tables to calendar mode, allowing you to view orders across any time range - working hours, a week, a month, or even a full year.

Create individual accounts for your employees with customized access permissions. For example, an employee can be restricted to specific tables, allowed to view or edit only certain orders, or authorized to run only specific triggers.

Integrate any payment gateway using our Payments API.
During the reservation process, you can charge the full amount or a partial payment, which can even be calculated dynamically based on the selected options.

Manage availability dynamically with multiple options:
- Use rules with complex schedules, including start and end times that shift relative to the current moment.
- Block availability for one resource based on reservations of other resources.
- Automatically block time between reservations for tasks like refueling or cleaning.
- Block availability directly from the manager's calendar.
- Enable 2-way synchronization with Google Calendar.


